Clear Outlook Auto-Complete Cache

May 17, 2023
 117
117
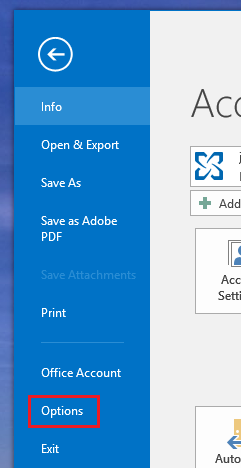
1. In the Outlook main window, click the File menu.

2. From the File menu, click the Options button.
3. In the Options, click the Mail tab and scroll down to the Send Messages section.

4. Click the Empty Auto-Complete List button.
5. A confirmation box will appear, click Yes. The Auto-Complete cache will be completely erased.


